There are a TON of these tutorials (just google "how to make tissue paper pom poms" and you'll get "About 380,000 results"), so I'm not going to re-invent the wheel. The bulk of them are based on Martha Stewart's tutorial, which I also worked off. The Polkadot Bride has a clear, concise tutorial that I also liked. I just wanted to share a few tips and modifiications I made get these pretty, cheery little lovelies!
So what you'll need are:
- Tissue Paper - this is where I had a field day and ordered a stack of them from eBay, some of which had flecks of glitter and metallic bits to make things more interesting
- String - Instead of the floral wire (which I don't have lying around the home), I used twine to tie everything up. A stapler is another alternative, but you'll need a heavy duty one that can staple a hefty stack of tissue paper.
- More string - This is for hanging up your fluffy tissue pompoms, but I used fishing line so they would appear to be "floating" rather than hanging.
Other modifications I made:
- Increasing the tissue stack from the suggested 8 sheets to a minimum of 12 and up to 20. The more, the merrier! The extra layers just make your pompom "fuller" when you fluff it all out. I tried one with 8 sheets and it looked a bit sad and malnourished :(
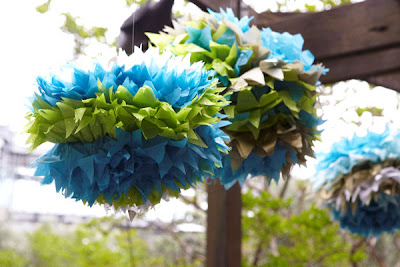
- Snipping away triangles instead of scallops after folding all the sheets accordion-style to get spiky pompoms. It really doesn't have to be perfect because it doesn't really show up (unless you've lopped off whole triangles or something spectacular).

After all of that, I ended up with oodles of 'em! Practice makes perfect, they say.. and each one got easier to make.

The trickiest part was fluffing the pompoms. I found that it was easier to start from one side and work through roughly half the layers, flip the funny looking half-sphere of tissue over and start fluffing the other side. You can adjust the overall shape at the end of it all, so don't be too worried if your pompom looks lopsided like I was when I first did it.
If all goes well, you'll have yourself some of these to liven up your corner of the world!


No comments:
Post a Comment